Vinyl Window Replacement Your Complete Guide
Vinyl window replacement offers a wealth of benefits, from enhanced energy efficiency to improved curb appeal. This comprehensive guide delves into every aspect, from understanding the various types of vinyl windows and their unique characteristics, to navigating the cost analysis and choosing the right contractor. We’ll also explore the installation process, post-installation care, and common troubleshooting tips, ensuring you’re fully prepared for a successful vinyl window replacement project.
Choosing the right vinyl windows can significantly impact your home’s aesthetics and energy performance. Different types of vinyl windows, such as single-hung, double-hung, and casement, each come with their own advantages and disadvantages. Understanding these nuances is crucial for making an informed decision. The guide will also explore the factors influencing costs, contractor selection, and preparation steps, leading you through the entire process with clarity and detail. From initial planning to the final touches, we’ve got you covered.
Introduction to Vinyl Window Replacement
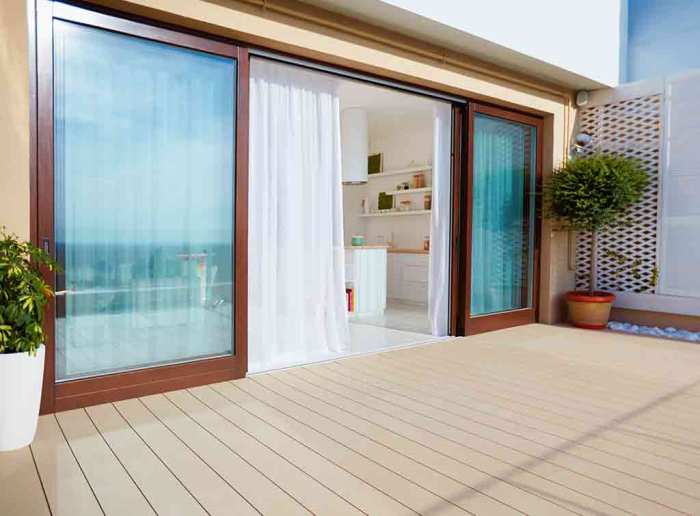
Vinyl window replacement is a popular home improvement choice, offering a balance of aesthetics, energy efficiency, and durability. This process involves replacing existing windows with new vinyl frames and panes. This modern material provides numerous benefits, contributing to a more comfortable and sustainable home.
Vinyl windows are a cost-effective and low-maintenance alternative to traditional materials like wood or aluminum. Their inherent properties make them suitable for various climates and architectural styles, presenting an attractive option for homeowners seeking improved home value and reduced energy bills.
Types of Vinyl Windows
Vinyl windows come in various configurations, each with its own set of characteristics. Understanding these differences helps homeowners choose the best fit for their needs and aesthetic preferences.
- Single-hung windows: These windows have a single, movable sash that slides vertically. They are a classic choice for their simplicity and affordability.
- Double-hung windows: This design features two movable sashes that slide vertically, allowing for more control over ventilation and light. They offer a greater degree of flexibility in adjusting airflow and light levels.
- Casement windows: These windows open outward, typically on hinges. Their outward-opening design provides ample ventilation and allows for easy access to the exterior.
Advantages and Disadvantages of Vinyl Window Types
The choice of vinyl window type depends on the specific needs and preferences of the homeowner. Each type offers unique advantages and disadvantages.
- Single-hung windows: Advantages include their affordability and ease of maintenance. Disadvantages are limited ventilation options and less versatility in light control.
- Double-hung windows: Advantages are their superior ventilation options and the ability to control light. Disadvantages can include higher cost compared to single-hung windows and potential for more frequent cleaning.
- Casement windows: Advantages include excellent ventilation and the ability to fully open the window for enhanced airflow. Disadvantages might include the need for more space for the outward-opening design and potential for difficulty in certain climates.
Comparison Table of Vinyl Window Types
The following table provides a concise comparison of different vinyl window types, considering their features, approximate costs, and maintenance requirements.
| Window Type | Features | Approximate Cost (per window) | Maintenance |
|---|---|---|---|
| Single-hung | Simple design, affordable, good for basic ventilation | $200-$500 | Low; requires occasional cleaning |
| Double-hung | Superior ventilation, adjustable light control | $300-$700 | Moderate; requires regular cleaning and potential for more frequent maintenance |
| Casement | Excellent ventilation, fully openable | $350-$800 | Low; requires occasional cleaning, potential for easier cleaning due to design |
Cost Analysis of Vinyl Window Replacement
Understanding the cost implications of replacing windows with vinyl is crucial for homeowners. Accurate cost estimations enable informed decisions and help manage project budgets effectively. Factors such as window size, type, and location significantly influence the final price.
Accurate cost estimations are essential for homeowners planning a vinyl window replacement project. This section delves into the key cost drivers, provides average cost ranges, and Artikels a method for calculating total project expenses. This will enable homeowners to make well-informed decisions about their projects.
Factors Influencing Vinyl Window Replacement Costs
Several factors contribute to the overall cost of vinyl window replacement. These factors must be considered for a comprehensive understanding of the project’s total cost.
- Window Size and Type:
- Material Quality:
- Installation Complexity:
- Labor Costs:
- Permitting and Inspections:
Larger windows and more complex window types (e.g., double-hung, casement, picture windows) generally lead to higher costs due to increased material and labor requirements. A larger window requires more material and often more complex installation procedures.
Higher-grade vinyl materials, enhanced features (e.g., energy-efficient glass), and specialized hardware can elevate the cost. Premium vinyl often incorporates advanced features to improve energy efficiency and durability.
Replacing windows in challenging locations (e.g., older homes with unique framing or limited access) or those requiring specialized installation techniques (e.g., retrofitting existing openings) will increase the labor costs. This can also involve intricate procedures, like adapting to existing structures or dealing with unusual access points.
Labor rates in a particular region significantly impact the overall cost. Professional installation is essential for proper window function and energy efficiency. Local labor rates vary, influencing the overall cost of the project.
Local building codes and regulations may require permits and inspections. The cost of these permits and inspections varies based on local ordinances. These administrative steps often add to the overall project cost.
Average Costs of Vinyl Window Replacement Projects
Average costs for vinyl window replacement projects fluctuate depending on several factors. The following ranges offer a general overview of the expenses involved.
Typical costs range from $300 to $1,500 per window, with an average closer to $800-$1200 per window. This variation is significant, reflecting the diversity of window sizes, materials, and installation complexity.
Cost Estimates for Different Window Sizes and Types
The size and type of window directly affect the cost.
- Small Single-Pane Windows:
- Large Double-Hung Windows:
- Picture Windows:
Replacement costs typically fall within the range of $300 to $600 per window.
These windows can cost from $800 to $1500 per window.
Picture windows, due to their larger size and often specialized installation, are often priced from $1200 to $2000 or more per window.
Breakdown of Typical Costs
A detailed breakdown of costs involved in a vinyl window replacement project is presented below.
| Category | Typical Cost Range |
|---|---|
| Materials (vinyl, glass, hardware) | $200 – $800 per window |
| Labor | $400 – $1000 per window |
| Permits and Inspections | $50 – $200 per window |
| Optional Extras (e.g., energy-efficient glass, specialized hardware) | Variable |
Calculating Total Cost
To calculate the total cost for a vinyl window replacement project, use the following formula:
Total Cost = (Cost per window * Number of windows) + (Permit & Inspection Costs) + (Optional Extra Costs)
For example, if you are replacing 4 windows, with an average cost of $1000 per window, the permit cost is $100, and the optional extras are $200, the total cost is:
Total Cost = ($1000 * 4) + $100 + $200 = $4300
Choosing a Contractor for Vinyl Window Replacement
Selecting the right contractor is crucial for a successful vinyl window replacement project. A reputable contractor ensures the job is done correctly, materials are high quality, and the project stays within budget and timeline. This section will detail the importance of vetting contractors, identifying essential qualities, and the process for finding and evaluating potential candidates.
Importance of a Reputable Contractor
A reputable contractor significantly impacts the overall quality and longevity of your vinyl window replacement. They bring specialized knowledge, experience, and resources to the project, minimizing potential problems. This includes ensuring proper installation, using quality materials, and adhering to building codes, ultimately leading to a more durable and energy-efficient outcome. Furthermore, a good contractor will provide clear communication throughout the process, addressing any concerns promptly and professionally.
Essential Qualities of a Reliable Contractor
Finding a reliable contractor for vinyl window replacement requires careful consideration. Essential qualities include proven experience in handling similar projects, strong adherence to building codes, a history of positive customer feedback, and a willingness to provide detailed estimates. These characteristics, when present, indicate a contractor capable of delivering a high-quality installation that meets your expectations.
Finding and Vetting Potential Contractors
Identifying potential contractors is a multi-step process. Begin by seeking recommendations from trusted sources, such as friends, family, or neighbors who have recently had similar work done. Online reviews and ratings from established platforms can also offer valuable insights into contractor performance. Check online directories, local business associations, and home improvement websites to locate potential candidates.
Evaluating Potential Contractors
| Criteria | Explanation |
|---|---|
| Licensing and Insurance | Verify that the contractor possesses the necessary licenses and carries adequate liability insurance. This protects you from potential financial losses if issues arise during or after the project. Ensure the insurance covers both general liability and workers’ compensation. |
| Experience | Inquire about the contractor’s experience with vinyl window installations. A contractor with a proven track record in this area will likely handle the project more efficiently and effectively. Look for a contractor who specializes in vinyl window replacement and has experience with various types of vinyl windows. |
| References | Request references from past clients to gain insight into the contractor’s work ethic, communication style, and overall performance. Thoroughly check the references and ask specific questions about the project’s quality, timeliness, and adherence to the agreed-upon budget. |
| Estimates and Proposals | Solicit detailed estimates from multiple contractors. These should include a breakdown of costs for materials, labor, and any other associated expenses. Compare the estimates carefully, ensuring they include all necessary elements. A detailed proposal should clearly Artikel the scope of work, project timeline, and payment terms. |
| Communication and Responsiveness | Assess the contractor’s communication skills and responsiveness. A reliable contractor will promptly return calls, respond to emails, and maintain clear and open communication throughout the project. This helps manage expectations and addresses any concerns efficiently. |
Getting Multiple Bids and Comparing Them
Requesting multiple bids is essential for getting the best value. Compare not only the total price but also the detailed breakdowns of materials, labor, and any additional costs. Consider the contractor’s reputation, experience, and communication style alongside the price. A comprehensive comparison allows you to make an informed decision based on both cost and quality.
“Don’t just focus on the lowest price; consider the value proposition offered by each contractor.”
Preparation for Vinyl Window Replacement
Preparing your home for vinyl window replacement is a crucial step that significantly impacts the efficiency and success of the entire project. Proper preparation minimizes potential issues during installation and ensures a smooth transition to your new windows. This involves meticulous planning and execution, from initial assessments to the final walk-through.
Essential Steps for Home Preparation
Thorough preparation ensures a clean and safe workspace for installers and safeguards your home’s structure. This phase involves careful consideration of the existing window frame and surrounding areas. Understanding the specific requirements for your home helps in efficient preparation.
- Assessment of Existing Windows: Inspect the current window frames for any signs of damage, rot, or decay. Document any pre-existing issues to inform the contractor of any necessary repairs or adjustments during the installation process. This step helps to avoid unexpected costs or delays.
- Exterior Wall Preparation: Clean the exterior walls surrounding the windows thoroughly to remove debris, dirt, and any loose paint. This allows for a cleaner installation and improves the adhesion of the new window frames to the walls.
- Interior Preparation: Remove any items, furniture, or decorations from the immediate vicinity of the windows to provide ample space for installers and ensure their safety. Protect interior walls and surfaces with appropriate coverings, like drop cloths, to prevent damage during the installation process.
Materials Needed for the Project
A well-stocked toolkit is essential for a successful preparation phase. Having the right materials available minimizes delays and ensures a smooth process.
- Cleaning Supplies: A pressure washer, cleaning solutions, and brushes are helpful for removing dirt and debris from exterior walls and window frames. Consider specialized cleaning solutions for removing stubborn stains or mildew.
- Protective Materials: Drop cloths, painter’s tape, and plastic sheeting protect interior surfaces and furnishings from potential damage. Choose durable materials that can withstand the installation process.
- Safety Gear: Gloves, safety glasses, and a dust mask are crucial for protecting yourself from potential hazards during the preparation and installation. These precautions are essential for worker safety and minimizing health risks.
Step-by-Step Guide for Preparing the Window Area
A systematic approach to preparing the window area enhances efficiency and minimizes the risk of mistakes. The sequence of steps ensures a seamless transition from the existing windows to the new ones.
- Clear the Area: Remove all furniture, decorations, and other items within a designated area around the windows to provide ample space for installers.
- Protect the Interior: Cover interior walls and surfaces with drop cloths and protective sheeting to prevent damage during the installation process.
- Clean the Exterior: Use a pressure washer or other cleaning tools to thoroughly clean the exterior walls and window frames, removing any dirt, debris, or loose paint.
- Inspect Existing Frames: Inspect the existing window frames for damage, rot, or decay. Document any issues for the contractor.
- Prepare for Installation: Ensure that all necessary materials are readily available and accessible for the installation crew.
Safety Precautions During Preparation
Prioritizing safety is paramount during the preparation phase. Adhering to safety precautions protects both the workers and the home’s structure. This involves understanding potential hazards and implementing preventative measures.
- Wear Protective Gear: Use safety glasses, gloves, and a dust mask to protect yourself from potential hazards, such as flying debris or irritants.
- Use Proper Tools: Use the appropriate tools and equipment for each task, avoiding the use of improper tools that may cause injuries.
- Secure the Work Area: Ensure the work area is stable and secure to prevent accidents or injuries.
- Be Mindful of Surroundings: Be aware of potential hazards, such as exposed wires or unstable structures.
Pre-Installation Checklist
A comprehensive checklist ensures all necessary steps are completed before the installation begins. This organized approach facilitates a smooth and efficient process.
| Task | Completion Status |
|---|---|
| Clear the area around the windows | [ ] |
| Protect interior walls and surfaces | [ ] |
| Clean exterior walls and window frames | [ ] |
| Inspect existing window frames for damage | [ ] |
| Gather all necessary materials | [ ] |
| Ensure safety precautions are in place | [ ] |
Installation Process for Vinyl Window Replacement
The installation of vinyl windows is a crucial step that determines the longevity and performance of the new windows. A meticulous and professional installation ensures proper sealing, energy efficiency, and the overall aesthetic appeal of the home improvement project. Thorough preparation, precise measurements, and adherence to established installation techniques are essential to a successful outcome.
Measuring for Vinyl Windows
Accurate measurements are paramount for a perfect fit. Incorrect measurements lead to issues like gaps, drafts, and difficulty in installation. Carefully measuring the existing window frame is essential to determine the precise dimensions of the new vinyl window. Using a measuring tape and marking the frame accurately ensures the new window aligns seamlessly with the existing opening. Double-checking measurements, especially the width and height, helps prevent costly mistakes later in the process.
Cutting Vinyl Windows (if applicable)
Some vinyl windows may require minor adjustments or trimming to perfectly fit the existing frame. If this is necessary, specialized tools like vinyl cutters and saws are employed. Care must be taken during the cutting process to avoid damaging the window’s integrity. Precise cutting is critical for a clean and professional finish. Improper cutting can lead to gaps or uneven surfaces, affecting the window’s functionality and appearance.
Installation Steps and Techniques
Proper installation techniques are critical to ensuring the long-term performance of vinyl windows. The installation process typically involves removing the old window, preparing the frame opening, and carefully installing the new vinyl window. Proper sealing is essential to prevent drafts and maintain energy efficiency.
Importance of Proper Installation Techniques
Adhering to the manufacturer’s guidelines and utilizing the recommended installation techniques is vital for a successful outcome. This includes using the appropriate fasteners, ensuring proper alignment, and verifying the window’s functionality after installation. Ignoring these details can compromise the structural integrity of the window and lead to costly repairs or replacements down the road.
Common Installation Mistakes and How to Avoid Them
Common mistakes include improper sealing, inadequate support, and insufficient caulking. Properly sealing the window frame, ensuring proper support for the window, and applying adequate caulking will prevent drafts and ensure a long-lasting installation. Double-checking all measurements and using appropriate tools will also mitigate potential issues.
Installation Procedure Summary
| Step | Description | Image Description |
|---|---|---|
| 1. Preparation | Remove old window carefully, ensuring no damage to the frame. Clean the frame opening thoroughly. | A picture of a worker carefully removing an old window. The frame opening is clean and ready for installation. |
| 2. Measuring | Measure the opening precisely using a measuring tape, marking the measurements on the frame for accuracy. | A picture of a person holding a measuring tape and marking measurements on a frame. |
| 3. Cutting (if applicable) | If necessary, use a vinyl cutter or saw to trim the vinyl window to the exact size of the opening. | A picture of a person using a vinyl cutter or saw to cut a vinyl window. |
| 4. Installation | Carefully install the vinyl window into the prepared opening, ensuring proper alignment and secure fastening. | A picture of a person installing a vinyl window into the frame. |
| 5. Sealing | Apply appropriate caulk or sealant around the window frame to create a tight seal and prevent drafts. | A picture of a person applying caulk or sealant around the window frame. |
| 6. Final Check | Verify the window’s functionality, including opening and closing mechanisms. Inspect for any gaps or issues. | A picture of a person checking the functionality of the installed vinyl window. |
Post-Installation Care and Maintenance: Vinyl Window Replacement
Proper post-installation care is crucial for maintaining the longevity and performance of your vinyl windows. Neglecting these steps can lead to premature wear, reduced energy efficiency, and potential damage. This section details the essential steps for maintaining your investment and ensuring years of trouble-free service.
A well-maintained vinyl window system will require minimal upkeep and will continue to perform its function as expected. Regular cleaning and inspection will help to identify and resolve any potential issues early on, saving you time and money in the long run.
Importance of Regular Cleaning
Regular cleaning is paramount to preventing the accumulation of dirt, grime, and debris that can compromise the aesthetics and performance of your windows. Dirt and debris can trap moisture, potentially leading to mold or mildew growth. Cleaning also removes the build-up of airborne pollutants, which can reduce the effectiveness of your window’s insulation properties.
Maintenance Steps for Vinyl Windows
Maintaining your vinyl windows involves a few key steps, which should be performed regularly. These simple tasks will keep your windows in optimal condition and help prevent costly repairs or replacements down the road.
- Exterior Cleaning: Use a mild detergent solution and a soft-bristled brush or sponge to clean the exterior surfaces of the windows. Avoid harsh chemicals or abrasive cleaners that can damage the vinyl. Rinse thoroughly with clean water and dry immediately to prevent water spots. Cleaning should be done at least once every three months, more frequently if the windows are exposed to high levels of pollution or heavy traffic.
- Interior Cleaning: Cleaning the interior surfaces of your windows is just as important as cleaning the exterior. Use a similar cleaning method as for the exterior. Remove any dust, dirt, or debris accumulated on the window frames. Regular cleaning will help to maintain the window’s appearance and preserve its structural integrity.
- Frame Inspection: Regularly inspect the window frames for any signs of damage or wear. Look for cracks, warping, or loose components. Addressing these issues promptly can prevent further damage and maintain the window’s structural integrity. Check the frames at least once a quarter. If you notice any problems, contact your contractor or a qualified professional for assistance.
- Weatherstripping Inspection: Inspect the weatherstripping regularly to ensure it remains intact and provides a proper seal. Replace any damaged or worn weatherstripping to maintain the window’s energy efficiency and prevent drafts. Inspect the weatherstripping at least twice a year.
Potential Issues and Solutions, Vinyl window replacement
While vinyl windows are known for their durability, certain issues can arise. Prompt attention to these problems can prevent significant damage or replacement costs.
- Water Damage: Check for water intrusion around the window frames. This can be a result of improperly sealed windows or damaged weatherstripping. Address any leaks immediately to prevent mold growth and structural damage.
- Drafts: If you experience drafts, check the weatherstripping and window seals for damage or gaps. Replace or repair as necessary. Properly sealed windows will reduce drafts and improve energy efficiency.
- Warped Frames: Warped window frames can indicate a problem with the window’s installation or improper handling. Contact your contractor or a qualified professional for inspection and repair.
Maintenance Schedule
The following table provides a suggested maintenance schedule for your vinyl windows. These intervals can be adjusted based on your specific environment and usage.
| Maintenance Task | Frequency |
|---|---|
| Exterior Cleaning | Every 3 months |
| Interior Cleaning | Every 3 months |
| Frame Inspection | Every 3 months |
| Weatherstripping Inspection | Twice a year |
Long-Term Benefits
Proper maintenance of vinyl windows yields significant long-term benefits. It not only extends the lifespan of your windows but also reduces energy consumption, improves comfort, and enhances the aesthetic appeal of your home. By following a consistent maintenance routine, you can safeguard your investment and enjoy a more energy-efficient and visually appealing living space for years to come.
Troubleshooting and Common Issues
Vinyl window replacements, while often a significant improvement, can sometimes present unforeseen challenges. Proper understanding of potential problems and their solutions is key to a positive experience. Addressing these issues promptly can prevent further damage and maintain the quality of your investment.
Troubleshooting common issues with vinyl windows involves a systematic approach. Careful observation of the window’s performance, coupled with a clear understanding of potential causes, can lead to effective resolutions. This section details common problems, their origins, and practical solutions.
Identifying Common Problems
Vinyl windows, like any other type of window, can experience various issues. Understanding the signs of these problems is essential for timely intervention. Leaks, drafts, sticking windows, and issues with the window frame are examples of problems that can arise.
Causes of Common Problems
Several factors can contribute to the problems with vinyl windows. Poor installation, inadequate sealing, and improper maintenance are frequent culprits. Inadequate caulking around the window frame, gaps in the window seal, and a lack of regular cleaning can all lead to issues. Furthermore, expansion and contraction of the window frame due to temperature changes may cause problems with the window operation.
Solutions for Troubleshooting Common Issues
Effective solutions are available for most vinyl window problems. Addressing leaks, for example, involves carefully inspecting the window frame and seals. Caulking gaps, and tightening any loose hardware are common remedies. Drafts can often be resolved with additional weatherstripping or by ensuring that the window frame is properly sealed. Sticking windows might need lubrication or adjustments to the window tracks. It is crucial to address these problems promptly to prevent further damage.
Warranty Information and Procedures
Most vinyl window installations come with a warranty. Understanding the terms of the warranty is crucial for navigating any issues that may arise. Reviewing the warranty documents will detail the coverage duration, the specific issues covered, and the procedures for making a claim. It is advisable to keep the warranty documentation readily available. Manufacturers’ websites or contacting the installer are useful for further clarification on warranty coverage.
Troubleshooting Tips for Common Issues
| Problem | Possible Cause | Troubleshooting Steps |
|---|---|---|
| Leaks | Gaps in seals, faulty seals, or improper caulking | Inspect seals, caulk gaps, and ensure proper installation. Check for damaged seals or missing caulk. If the problem persists, contact the installer or manufacturer. |
| Drafts | Gaps around the window frame, insufficient weatherstripping | Check for gaps and use weatherstripping to seal them. Ensure proper installation of the window frame and seals. |
| Sticking Windows | Dirty tracks, worn seals, or improper lubrication | Clean window tracks thoroughly. Lubricate tracks and hinges with a suitable lubricant. If the problem persists, contact the installer or manufacturer. |
| Window Frame Issues | Improper installation, expansion/contraction due to temperature fluctuations, or damage | Check for cracks or warping in the frame. Ensure proper installation of the window frame and seals. Address temperature-related issues as needed. Contact the installer or manufacturer for assistance. |
Energy Efficiency of Vinyl Windows

Source: windowdepottylertx.com
Vinyl windows are recognized for their significant contribution to energy efficiency in homes. Their inherent properties, coupled with modern design features, enable substantial savings on heating and cooling bills. This section details the advantages and mechanisms behind these energy-saving capabilities.
Properly installed vinyl windows, with their insulating qualities, effectively reduce heat transfer, both in and out of the home. This translates directly to reduced energy consumption, contributing to a more sustainable and economical living environment.
Advantages of Vinyl Window Insulation
Vinyl windows excel at preventing heat loss and gain due to their inherent properties. Their rigid frame structure and excellent thermal performance provide a robust barrier against drafts and temperature fluctuations. This translates into significant energy savings.
Mechanisms of Energy Savings
Several factors contribute to the energy-saving capabilities of vinyl windows. The low thermal conductivity of vinyl itself minimizes heat transfer. Furthermore, modern vinyl windows often feature multiple panes of glass, along with inert gas fillings between the panes, creating an insulating layer. These combined elements dramatically reduce the transfer of heat.
Energy-Efficient Vinyl Window Designs
Various design elements enhance the energy efficiency of vinyl windows. Double-paned or triple-paned units, with insulated glass, are common. Gas-filled chambers between the panes, like argon or krypton, further reduce heat transfer. Low-Emissivity (Low-E) coatings on the glass surfaces reflect heat, maximizing energy efficiency.
Impact on Heating and Cooling Costs
Vinyl windows demonstrably reduce energy consumption for heating and cooling. The improved insulation minimizes the need for supplementary heating or cooling, resulting in lower utility bills. Studies consistently show that homes with energy-efficient vinyl windows experience substantial reductions in energy costs compared to those with older or less insulated windows.
Data on Energy Savings
Empirical data showcases the substantial savings possible with vinyl windows. For instance, a home with vinyl windows that meet current energy efficiency standards could potentially reduce heating costs by 15-30% and cooling costs by 10-20% compared to homes with older windows. These savings can vary based on local climate conditions, the specific window design, and the overall energy efficiency of the home.
Examples of Energy-Efficient Vinyl Windows
A prime example of energy-efficient vinyl windows is the use of triple-paned units with Low-E coatings. These configurations provide an exceptional barrier to heat transfer, making them ideal for climates with extreme temperature variations. Further, the use of advanced insulating glass in vinyl windows can result in a higher U-factor rating, which directly translates into reduced heat loss and substantial energy savings.
Closing Summary

Source: atlantavinylwindows.com
In conclusion, replacing your windows with vinyl offers a significant upgrade to your home. This guide has provided a thorough overview of the entire process, from understanding the various vinyl window types to choosing a reliable contractor and ensuring proper installation and maintenance. By following the steps Artikeld, you can confidently navigate the entire process and enjoy the long-term benefits of vinyl window replacement, including improved energy efficiency, enhanced curb appeal, and increased property value. Remember to carefully consider your needs, budget, and preferences throughout the process for a successful outcome.